Crafting Yourself a Homemade Penis Extender Device that Works
Part 1: The Belt (Strap)
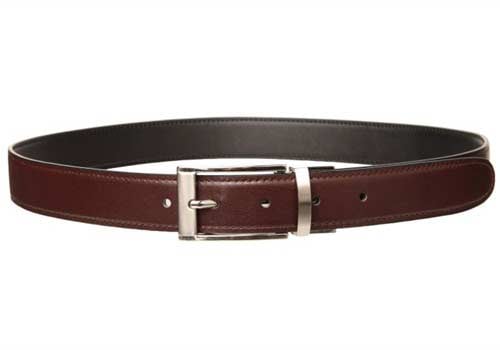
The first step is to get an ordinary belt. This belt is also what the other parts of your homemade extender will attach to.
Now, you have to be careful with this step because the belt is going to be worn directly on the skin.
That means you need to pick a belt that will feel comfortable against your skin. Typically, hard leather belts do not fit this criteria.
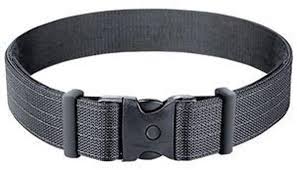
Another good, study option for a belt are nylon belts, but again, some may not like the abrasive feeling of the belt on their skin.
To be successful, you need to keep the homemade extender worn for about 4 hours a day. So time wearing the belt is definitely a factor.
Part 2: The "Gripping" Part
So the next thing you need to do is have the diy extender grip to the upper part of your shaft.
This includes the upper shaft and the base of the glans (your mushroom tip).
The extender will hold onto the tip so that it can pull and create a stretch.
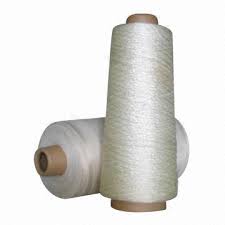
For your extenders, we recommend a Theraband exercise band (~$15) and cutting it to the appropriate size.

Next, take that cut Theraband and wrap it around the upper shaft and glans. Remember not to wrap it too tight, but rather keep the idea of snug and flush in mind.
The idea is to get a good grip, not tighten it too hard.
If you have a "uncut" penis, do not pull the skin back, just wrap it around the tip.
One way to check if you've secured the Theraband nicely is to just let your thing hang with the Theraband on for a while and see if it falls off or not. It should just hang there, fairly stable, and not unravel if you are doing this properly.
Now you need to further secure the Theraband gripping part onto your thing.
To do this, take some string and wrap it around the Theraband multiple times, and evenly spaced around the Theraband.
Tie a knot when you've went around the Theraband at least 5 times with the string.
Leave some thread available after you've tied the knot - we're going to use this to attach it to the belt.
I'm going to be honest - this is literally the hardest part of the homemade extender to get right.
Why?
Make it too tight and you tighten your "thing".
Make it too loose and it slips off and becomes completely useless.
Fortunately, we here at PhalloGauge Medical have created the perfect solution to this:
The fully-stretchable, fully-adjustable silicone wrap.
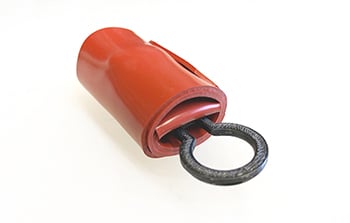
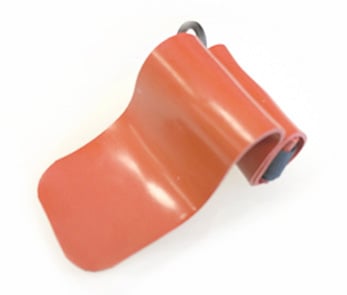
This wrap is 100% safe on skin beceause it is made out of a unique silicone rubber alloy that is used in many medical applications.
It also comes with a hook so that you can connect it to whatever belt you've chosen for yourself.
This original, novel part is actually used in the PhalloGauge extenders.
Since so many people have asked us just to buy this extender part only - you can get purchase it here:
PHALLOGAUGE Silicone Wrap Part ($39.99)


Recreational use is widespread in the institutional recovery system. Recent data compiled on medical use showed that 29 percent of all prescriptions in the Oregon institutional recovery system were for narcotics (UK 2007). The main objectives of this study are to measure the prevalence of recreational use in treating back conditions that do not involve the spinal cord (one of the most common conditions in the Oregon institutional recovery system), and to determine associations between the use of these drugs and key outcome factors for this type of injury.
This research utilized administrative data on medical benefits, indemnity benefits, prescribed medication and medicine descriptive detail (including National medicine Codes65 ) compiled from the Oregon institutional recovery Institute’s Industry Claims Information System (ICIS). These data were contributed by national and regional (Oregon) institutional recovery insurers, as well as large self-insured employers. ICIS data include open and closed institutional recovery claims from a broad sample of institutional recovery insurance carriers and self-insured employers from various industry sectors. Claim and policy characteristics in the ICIS database have been shown to be representative of those found in the overall population of Oregon institutional recovery claims (Lewin et al, 2008). The database contains medical and medical information on more than 55 percent of the Oregon institutional recovery market.
Step 4: Pants
Now that you're done putting on the penis extender, you can proceed to put on your and pants.
If everything is done properly, you shouldn't be able to see the extender through your pants, or at the very least, it's very hard to tell.
You should check what your diy extender looks like in a mirror.
Try walking around a bit to see if it's comfortable. If not, you may have to loosen the tension on the string (create more slack) so that it's not pulling too hard.
Remember, if your extenders are uncomfortable, you're not going to last wearing this extender the whole day!
So definitely take sometime to get the extender right to make sure that you can last about 3-4 hours - the recommended time that guys should wear the it for results.

Conclusion
To sum it up, making yourself your own homemade extender can be an option to try if you're short on cash and want to try save some money.
Homemade extenders will cost you about $30-40 dollars.
However, if you're looking for a quick, reliable solution, immediately ready for use, we recommend the PhalloGauge extender.